시각지능
1. CNN
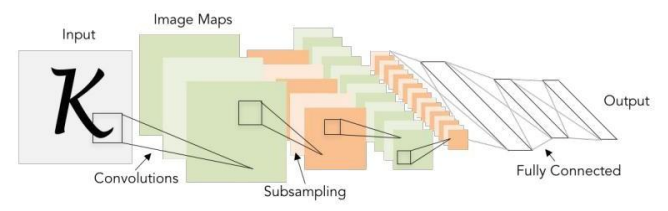
시각지능 = CNN(Convolutional Neural Networks)
1. 이미지의 조각을 본다
2. 각 조각이 조합된 패턴을 본다.
3. 점점 더 복잡한 조합의 패턴을 본다.
4. 반응하는 여러 패턴의 조합을 가지고 이미지를 인식한다.
이미지에 대한 패턴을 기계가 스스로 학습한다.
il = Input(shape=(32,32,3))
Conv2D(filters=32,            # 새롭게 제작하려는 feature map의 수
            kernel_size=(3,3),     # 훑는 filter의 가로세로 사이즈
            strides=(1,1),         # filter가 훑을 때, 세세하게 훑을 것인가 좀 더 거칠게 훑을 것인가 조정
            padding='same',        # 덧붙임 : 1. 외곽의 정보를 더 반영하려고 | 2. feature map의 가로세로 사이즈를 유지하려고
            activation='relu')

BatchNormalization()
MaxPool2D(pool_size=(2,2),    # pooling filter의 가로세로 사이즈
               strides=(2,2))(hl)  # 기본적으로 pool_size를 따라감

Dropout(0.25)
Flatten()
# Fully Connected Layer : 노드 1024개
Dense(1024, activation='relu')
Dense(10, activation='softmax')
2. Data Augmentation
from tensorflow.keras.preprocessing.image import ImageDataGenerator

aug = ImageDataGenerator(rotation_range=30,      # 이미지 회전
                         width_shift_range=0.1,  # 이미지 좌우 이동
                         height_shift_range=0.1, # 이미지 상하 이동
                         zoom_range=0.2,         # 확대/축소 범위
                         shear_range=0.2,        # 비스듬히 늘림
                         horizontal_flip=True,   # 가로 전환
                         vertical_flip=True,     # 세로 전환
                         fill_mode='nearest')    # 마지막 옵션 주의하자. 이미지 회전, 이동, 축소할 때 발생하는 공간을 채우는 방식

imageGen = aug.flow(image, # 이미지 어레이를 받는다.
                    batch_size=1,
                    save_to_dir='output',
                    save_prefix='image',
                    save_format='jpg' )
3. Transfer Learning
from tensorflow.keras.applications.inception_v3 import InceptionV3
keras.backend.clear_session()
base_model = InceptionV3(weights='imagenet', # 이미지넷 데이터 바탕으로 미리 학습된 것
include_top=False, # 마지막 레이어 빼고!
input_shape= (299,299,3)) # 입력 데이터의 형태
new_output = GlobalAveragePooling2D()(base_model.output)
new_output = Dense(3, # class 3개 클래스 개수만큼 진행한다.
activation = 'softmax')(new_output)
model = keras.models.Model(base_model.inputs, new_output)
# 학습시킬 레이어와 고정시킬 레이어 결정
for idx, layer in enumerate(model.layers) :
if idx < 213 :
layer.trainable = False
else :
layer.trainable = True
model.compile(loss='categorical_crossentropy', metrics=['accuracy'],
optimizer=keras.optimizers.Adam(learning_rate=0.001) )
lr_reduction = ReduceLROnPlateau(monitor='val_loss',
patience=4,
verbose=1,
factor=0.5,
min_lr=0.000001)
es = EarlyStopping(monitor='val_loss',
min_delta=0, # 개선되고 있다고 판단하기 위한 최소 변화량
patience=15, # 개선 없는 epoch 얼마나 기달려 줄거야
verbose=1,
restore_best_weights=True)
datagen = ImageDataGenerator(
featurewise_center=False, # set input mean to 0 over the dataset
samplewise_center=False, # set each sample mean to 0
featurewise_std_normalization=False, # divide inputs by std of the dataset
samplewise_std_normalization=False, # divide each input by its std
zca_whitening=False, # apply ZCA whitening
rotation_range=180, # randomly rotate images in the range (degrees, 0 to 180)
zoom_range = 0.3, # Randomly zoom image
width_shift_range=0.3, # randomly shift images horizontally (fraction of total width)
height_shift_range=0.3, # randomly shift images vertically (fraction of total height)
horizontal_flip=True, # randomly flip images
vertical_flip=True) # randomly flip images
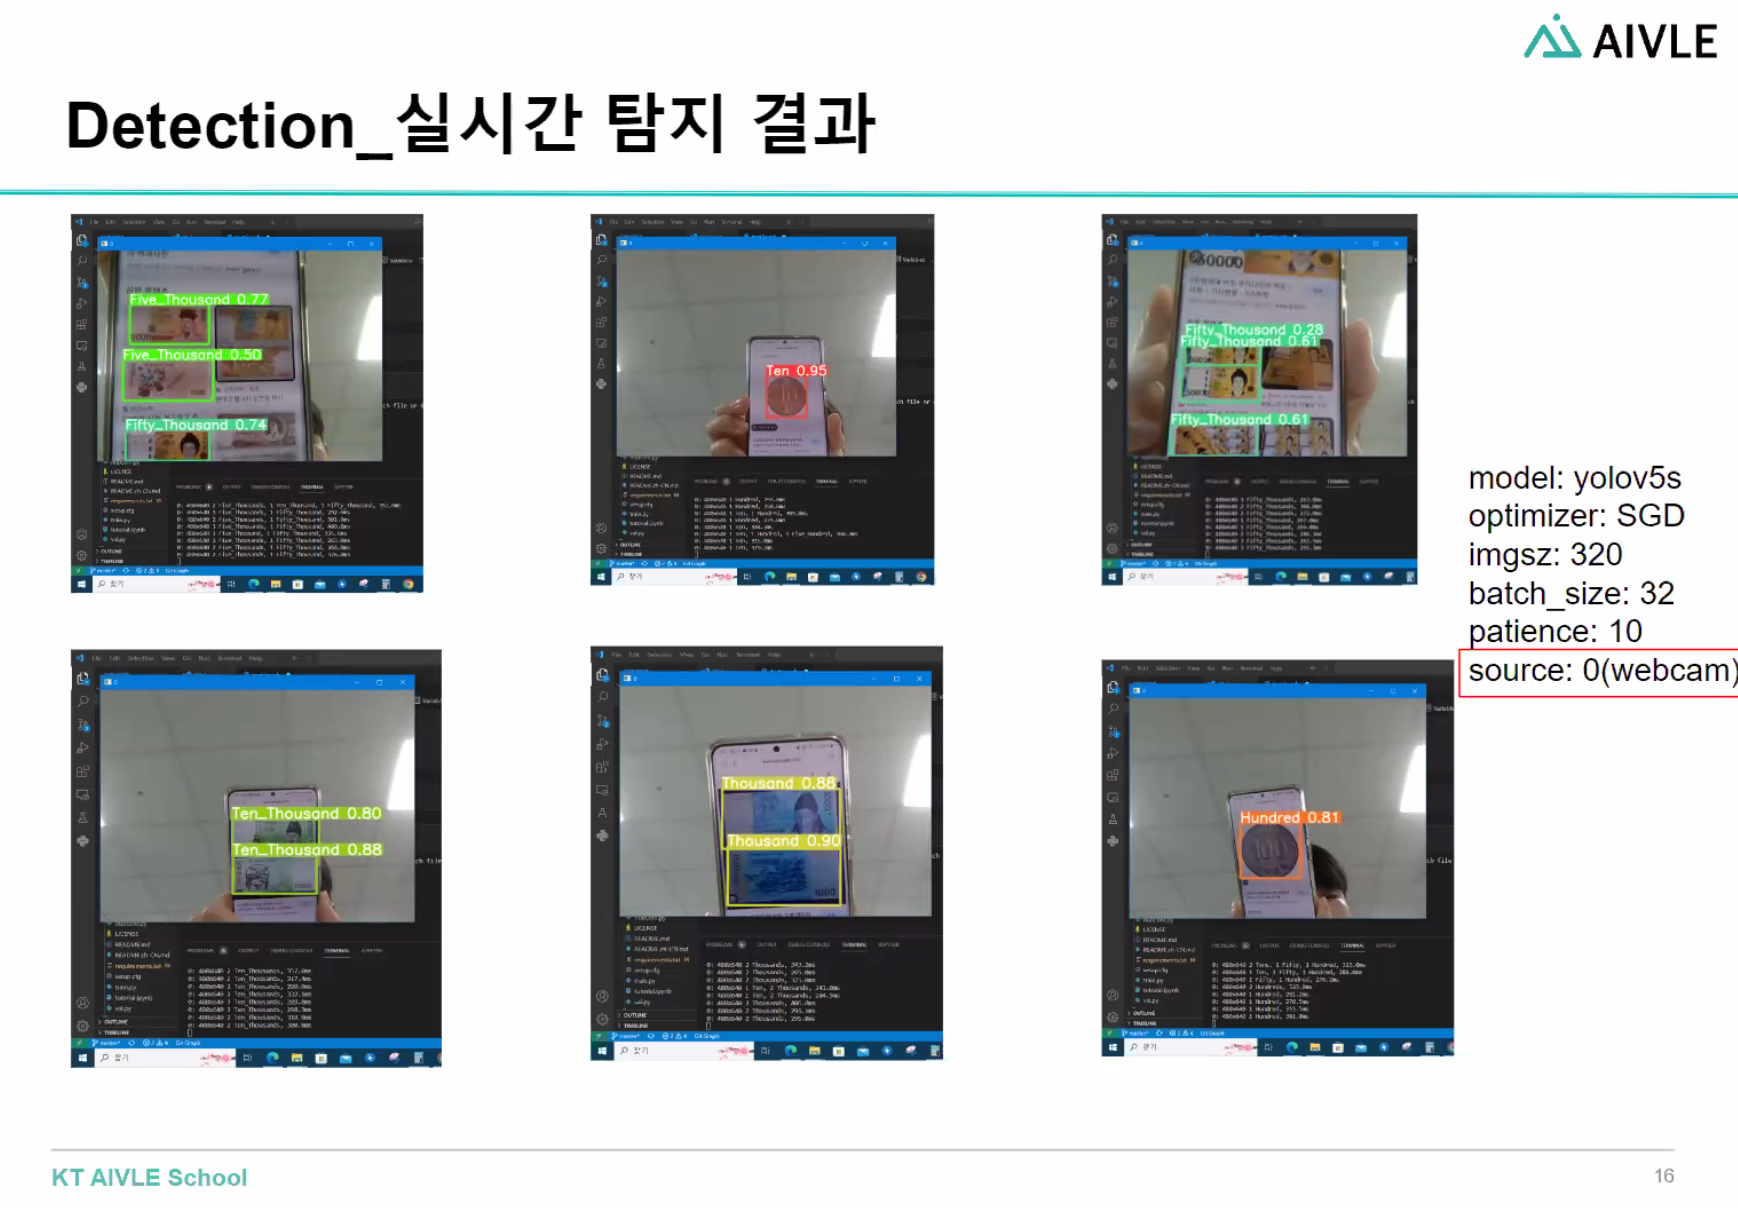
datagen.fit(train_x)4. Object Detection
yolo 라이브러리를 이용해서 object detection하기
!git clone https://github.com/ultralytics/yolov3.git # yolo git에서 복사해서 설치
!cd yolov3; pip install -r /content/yolov3/requirements.txt # requirements 내부 패키지 설치
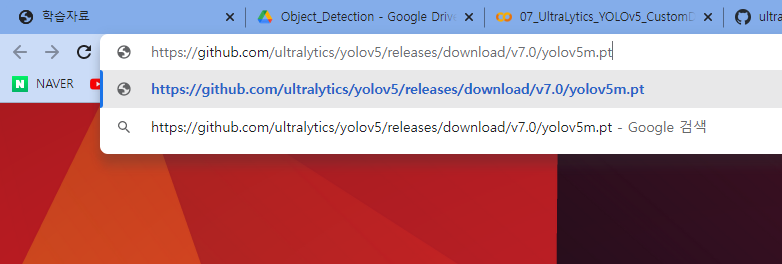
# 가중치 받기
!wget -O /content/yolov3/pretrained/yolov3-tiny.pt https://github.com/ultralytics/yolov3/releases/download/v9.6.0/yolov3-tiny.pt
# detect.py
!cd yolov3; python detect.py \
--weights '/content/yolov3/pretrained/yolov3-tiny.pt' \
--source '/content/yolov3/data/images/14th_street.jpg' \
--project '/content/yolov3/detected' \
--name 'images' \
--img 640 \
--conf-thres 0.5 \
--iou-thres 0.4 \
--line-thickness 2 \
--exist-ok
non maximum suppression
annotation
confidence score
nms 알고리즘
iou
iou threshold
ms coco
yolo
기울기 손실
Object Detection의 핵심원리
1. bounding Box 하나의 오브젝트가 무조건 들어있는 박스
- 구성요소 : x(x좌표), y(y좌표), w(너비), h(높이)
위 4가지 변수를 사용하여 이미지에 박스를 그린다.
flatten vs globalpooling
transfer learning 에서
resnet, inception등 다른 모델의 특징들 정리하기
batchnormalize, drop등 레이어 파라미터 들을 넣을때와 안넣을때를 비교하여 레이어 쎃기
이 모델에 대해 과적합인지 아닌지 그래프그려서 확인해보기
3~4개 정도 틀렸다고 했을때 이게 왜 틀렸는지 이미지로 확인해보고, 가설을 세워보고, 해결방법

learning rate
학습할때 epochs에 따른 accuracy그래프 그리기
finetunnig
2진분류 문제
https://blog.kakaocdn.net/dn/4GZjr/btr5eoQHUnf/KICxyWTUB8wp3oqU6M4Rok/img.png
albumentations library
roboflow 라벨링을 잘못했을때 확인